How to Sell on ChatGPT with WooCommerce
When someone opens ChatGPT and types "recommend a good espresso machine under $200 for a small apartment." A few seconds later, they're looking at three real products, with real prices, from real stores. They tap one, land on that store's website, and check out. No Google search, no scrolling through ten review sites, no ads.
That store didn't get lucky. It registered its catalog with OpenAI, cleaned up its product data, and made itself readable to ChatGPT the same way it once made itself readable to Google. If you sell on WooCommerce, that same door is open to you right now, and this guide covers exactly how to walk through it.
How OpenAI’s ChatGPT Shopping Program Works for WooCommerce Stores
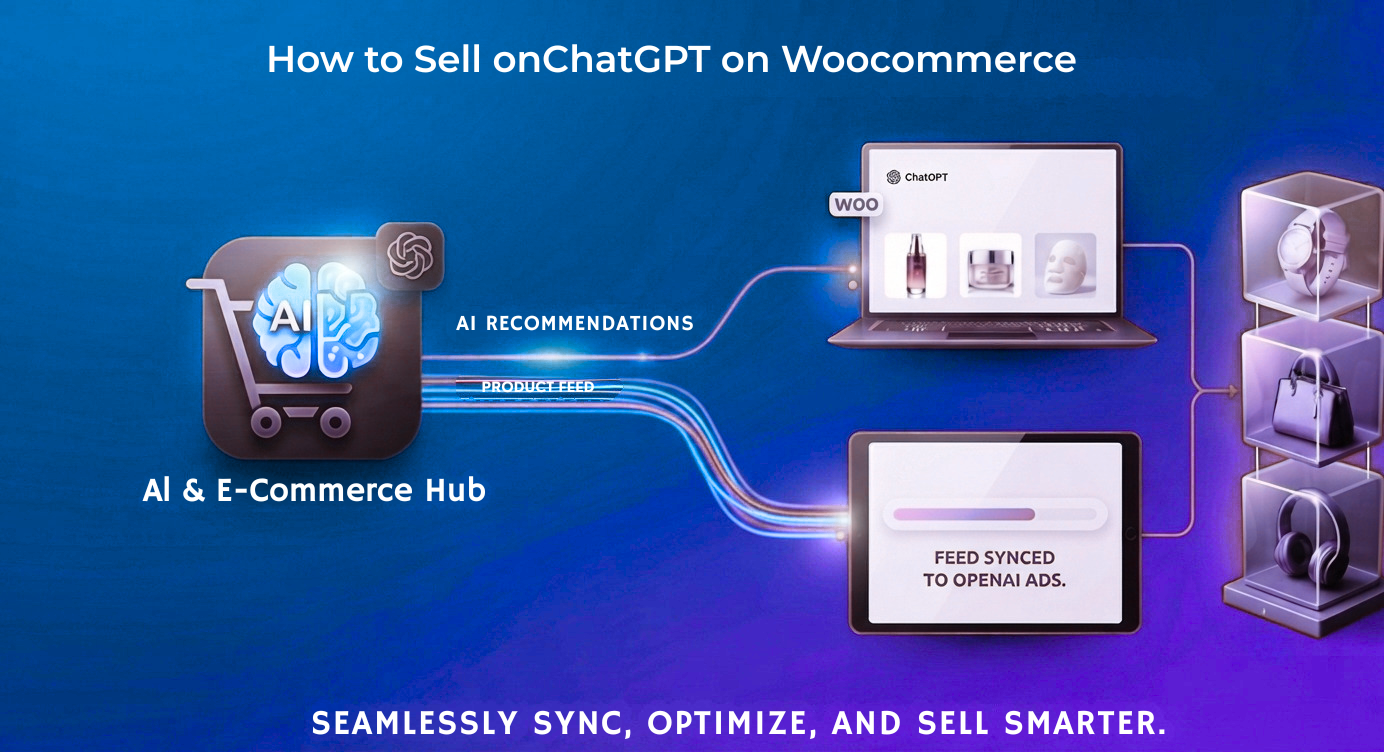
OpenAI runs a merchant program that lets ChatGPT pull real products into its answers when someone asks a shopping question. The technical name for the connection is the Agentic Commerce Protocol, or ACP, built by OpenAI alongside Stripe. It lets your store's product data, and in some cases your checkout, communicate directly with ChatGPT.
One thing to get straight before anything else: for almost every WooCommerce store, ChatGPT handles the recommendation, not the sale. The shopper still clicks through and buys on your own site. You're not handing your customer to OpenAI. You're getting found by someone who was about to buy from whoever answered their question first, and making sure that's you instead of a competitor.
The program opened to merchants in late 2025 and is currently rolling out to U.S. sellers first, with other regions following.
What You Need Before You Start
- A working WooCommerce store with products that have accurate titles, descriptions, prices, and stock status
- Product identifiers (GTIN or MPN) for every product you want listed, covered in detail below
- A product feed plugin capable of generating a feed in OpenAI's required format
Why Sell on ChatGPT with WooCommerce is Beneficial
It's fair to ask whether this is premature or a genuine opportunity. A few honest points on both sides:
- There's no guaranteed traffic number: This behaves more like appearing in a new organic channel than buying ad placement; some stores will see meaningful traffic, others less so, depending on their category and how well their data matches what people are asking.
- You keep full ownership of the customer: Because the sale closes on your own WooCommerce checkout, you capture the email address, the order history, and the chance to build a repeat customer, instead of a middleman owning that relationship.
- You can still upsell: Sending shoppers to your own site means your cross-sells, order bumps, and related-product suggestions still work at checkout, something a fully native in-chat purchase wouldn't allow.
- The setup cost is mostly time, not money: Registering as a merchant is free, and most of the actual work, meaning accurate stock levels, real product identifiers, and decent product images, is work that improves how you perform on Google Shopping and comparison sites too. You're not building something single-purpose.
- Getting in early has a real advantage: Fewer WooCommerce stores have gone through this setup so far, which means less competition for the same product queries right now than there will be in a year.
Need reliable infrastructure for AI-driven commerce? Explore our managed WooCommerce hosting plans.
How to Sell on ChatGPT with WooCommerce (Explained Step-by-step)
There are five distinct steps here. Skipping ahead or doing them out of order is the single biggest reason store owners get stuck, so it's worth reading through each one fully before touching your admin dashboard.
Step 1: Register as a Merchant with OpenAI
Start here, before anything else, because this step has the longest and least predictable wait time.
Head to OpenAI's merchant application at ChatGPT merchants and begin the sign-up. You'll be asked for:
- Your business name and legal details
- The region or country you operate in
- The general categories of products you sell
- Agreement to OpenAI's commerce policies and terms
Once submitted, you'll receive a confirmation email. From there, your application sits in OpenAI's review queue. There's no published SLA or guaranteed turnaround, but based on what merchants have shared publicly, initial review has run anywhere from a few days to several weeks depending on volume.
When your application clears review, OpenAI reaches out with next steps, which is when they'll ask you to provide your product feed URL. That's your cue to move to the technical steps below, if you haven't already prepared them in parallel.
Why this needs to happen first: everything else in this guide, your identifiers, your feed, and your validation can be prepared while you wait. The approval clock only starts once you've applied, so applying late means everything downstream gets delayed too, even if your technical setup is flawless.
Step 2: Add GTIN or MPN Identifiers to Every Product
This is the step most WooCommerce store owners get stuck on, and it deserves the most careful walkthrough.
OpenAI requires every product in your feed to carry one of two identifier types:
- GTIN (Global Trade Item Number): The barcode number on a product. It covers UPCs (12-digit codes, most common for U.S. products), EANs (13-digit codes, common internationally), and ISBNs for books. If you resell products made by other brands, this number already exists, it's just a matter of finding it.
- MPN (Manufacturer Part Number): A reference number that identifies a specific product. If you manufacture your own products or sell under your own brand, you create and assign this number yourself.
Where to add these in WooCommerce, exactly:
- Go to Products > All Products in your WordPress dashboard.
- Open the product you want to edit.
- Scroll down to the Product Data panel, which sits below the main description editor.
- Look for the SKU field first. Directly below or near it, you'll find dedicated fields for GTIN, UPC, EAN, and ISBN, depending on your WooCommerce version and any extensions you have active.
- If your setup doesn't show a separate GTIN field, use the SKU field to hold your MPN instead; OpenAI's feed mapping can pull from either location.
How to actually find or create these numbers, by situation:
- You resell branded products: Check the barcode printed on the physical packaging first. If you don't have the item in hand, your supplier's product spec sheet almost always lists it, or the manufacturer's own product page.
- You manufacture or private-label your own products: Create a consistent MPN format and stick to it across your entire catalog. Something like ZAV-RING-014 (brand-category-number) works well because it stays sortable and readable as your catalog grows.
- You sell handmade or one-of-a-kind pieces: Assign a unique MPN per item, following whatever numbering system your inventory already uses.
- You sell books: Use the ISBN. It's already a globally recognized identifier, so there's no extra work here.
- You genuinely can't find a GTIN for a resold product: Fall back to creating your own MPN for that product rather than leaving the field blank. A blank identifier field is what causes feed rejection, not which identifier type you used.
Doing this at scale without losing a week to it:
Editing products one at a time is fine for a catalog of a few dozen items, but painfully slow past that. Instead:
- Go to WooCommerce > Products and click Export.
- Download your full catalog as a CSV file.
- Open it in Excel or Google Sheets.
- Add a GTIN or MPN value for every row that's missing one.
- Save the file, then go to WooCommerce > Products > Import and re-upload it, mapping the GTIN/MPN column to the matching WooCommerce field during import.
This turns what could be days of manual product editing into an afternoon of spreadsheet work.
Step 3: Install and Set Up a Product Feed Plugin
To generate a feed in the format OpenAI expects, you need a WooCommerce product feed plugin. Several are available, and most support OpenAI as a destination channel alongside Google Shopping, Meta, and other advertising or comparison platforms, so this is a configuration task, not custom development.
The general setup, regardless of which plugin you choose, looks like this:
- Install and activate the plugin the same way you would any WordPress plugin, through Plugins > Add New or by uploading it manually.
- Activate your license, if the plugin requires one, usually from a dedicated license or Settings tab inside the plugin's own admin menu. You'll typically find your license key in the account dashboard on the plugin provider's website.
- Once activated, you're ready to move into building the actual feed.
| Plugin | Free/Paid | Starting Price | Best For | Features |
| RexFeed (RexTheme) | Both | $79.99/yr | 200+ Predefined Feed Templates | Built-in Feed Validator checks against OpenAI's spec before submission |
| CTX Feed (WebAppick) | Both | $119/yr | Broad channels, lower entry cost | Static + dynamic attribute mapping without touching product data |
| Product Feed Pro/Elite (AdTribes) | Both | $99.50/yr | 250+ feed templates | Automatic refresh & custom intervals, Rules & filters builder, Product data manipulation |
| WebToffee Product Feed | Both | $89/yr | Multi-vendor (Dokan/WC Vendors), multilingual stores | Per-product toggle for ChatGPT search/checkout eligibility + built-in validator |
| Webkul ChatGPT Product Feed | Paid | Custom pricing | Full in-chat checkout, not just discovery | Handles the entire ACP checkout lifecycle, tax/shipping calc + Stripe payments |
| Ovena (Agentic Commerce Protocol plugin) | Free | $0 | Testing full ACP checkout with zero cost | Open source, OAuth-secured full catalog sync, newer, worth a staging test first |
Step 4: Configure and Generate Your OpenAI Product Feed
This is where most of the real setup work happens, and it's worth going through each screen deliberately rather than accepting every default.
- In your WordPress admin, go to Product Feed > Create Feed.
- Give it a name you'll recognize later, and choose your target country.
- Under Channels, choose OpenAI Product Feed.
- JSONL is the format OpenAI prefers, so select that rather than one of the alternatives on offer.
- Click Save & Continue to advance to the next screen.
- Most OpenAI-required attributes are already mapped for you. Go through each one and confirm it's pulling from the right WooCommerce field rather than trusting the defaults blindly, especially price, availability, and your GTIN/MPN identifiers.
- If a field you need isn't listed, use the "+ Add Custom Field" button at the bottom of the screen to map it manually, then click Save & Continue again.
- This screen lets you transform how a field is formatted or sourced before it lands in the feed. If your product data is already in good shape, click Save Changes without touching anything here, it's entirely optional.
- Decide which products actually belong in this feed and which should be held back, by category, stock status, price, or any custom condition that makes sense for your catalog.
- Enabling it appends UTM parameters to every product URL in the feed automatically, so ChatGPT-driven clicks and conversions show up as their own line in Analytics instead of blending into everything else.
- Click Generate Product Feed. The plugin builds the file and gives you a stable feed URL.
Step 5: Submit Your Feed to OpenAI for Validation
Once OpenAI has approved your merchant application from Step 1, they'll email instructions for submitting your feed through their merchant portal.
- Inside your feed plugin, this usually sits on a "Manage Feeds" or similar screen, where you can copy the direct link to the feed you generated in Step 4.
- Submit the URL by following the exact instructions in OpenAI's email, since the submission process is handled through their merchant portal rather than your WordPress dashboard.
- OpenAI checks your feed against their commerce specifications, and this step typically completes within 24 to 48 hours.
If your feed fails validation, the portal tells you specifically which products and fields caused the problem. The three most common reasons:
- Missing GTIN or MPN on some products, almost always the result of a bulk import that skipped a handful of rows
- Price listed without a currency code, often a default formatting setting in the feed plugin that wasn't double-checked before generating
- Product images too small or in an unsupported format, usually older photos that were fine for your storefront but don't meet OpenAI's feed image requirements
Fix only the specific fields flagged, regenerate the feed inside your plugin, and resubmit. There's no need to restart the whole process from scratch.
Once your feed passes, your products begin appearing in ChatGPT's shopping results for relevant queries. Shoppers click through, land on your WooCommerce store, and complete checkout there, where your existing upsells and cross-sells still apply.
What Changes on Your Store Once You Go Live
Getting approved isn't the finish line, it's the start of an ongoing maintenance habit.
- Your feed has to stay current. If a price or stock level changes on your site but hasn't synced to the feed yet, ChatGPT could recommend outdated information, which is one of the fastest ways to get a listing flagged again.
- Your checkout experience matters more than it used to. Every shopper arriving from a ChatGPT recommendation lands on your regular WooCommerce checkout. If that page is slow, cluttered, or forces unnecessary steps, you lose a visitor who showed up ready to buy.
- Your upsell and cross-sell setup earns its keep here. Since the purchase happens on your own site, this is exactly where you recover margin that a fully native in-chat checkout wouldn't have allowed you to capture.
- Your hosting does more work than it looks like from the outside. Real-time feed syncing and fast responses to catalog requests depend on your server holding up under that load, not just your storefront rendering fine in a browser. Slow response times during a feed refresh risk sending stale data through, which is a quiet but real reason some stores preparing for this kind of integration start paying closer attention to their WooCommerce hosting environment.
Mistakes That Slow Down or Sink Your Approval
- Applying to the merchant program late instead of first. Treat it as the very first task, running in parallel with your product data cleanup, not something you do after everything else is ready.
- Skipping product identifiers on part of the catalog. A handful of products missing GTIN or MPN is enough to trigger a validation failure across the whole feed.
- Assuming this replaces your existing SEO work or your store itself. It doesn't. Your WooCommerce site remains the system that processes every order, and this is simply an additional way shoppers find you.
- Getting the feed approved and then not touching your checkout page. A strong feed sending traffic to a weak or slow checkout wastes the setup work you just put in.
- Forgetting that non-physical products may work differently. Digital downloads, subscriptions, and services may follow separate requirements than physical goods, since this part of the program is still developing — worth checking OpenAI's current merchant guidelines if that applies to part of your catalog.
Frequently Asked Questions
1. What if some of my products genuinely don't have a GTIN?
For resold products, check the packaging, your supplier's spec sheet, or the manufacturer's site first. For anything you make or private-label yourself, assign your own MPN and keep the format consistent going forward; there's no requirement that it come from an official registry.
2. How long does the whole process take, start to finish?
There's no fixed number, since OpenAI hasn't published one. Realistically, budget a few days to a few weeks for merchant approval, plus 24 to 48 hours for feed validation once you submit. Running your product data cleanup and your merchant application at the same time is the best way to shorten the overall timeline.
3. Can I sell digital products or subscriptions through this?
Physical products are the primary focus of the feature today. Digital downloads and subscriptions may have different requirements, or might not be fully supported yet. Check OpenAI's current merchant guidelines directly if a meaningful part of your catalog is non-physical, since this is likely to expand over time.
4. Does this replace the SEO and marketing work I'm already doing?
No. Think of it as an additional discovery channel sitting alongside your existing search visibility, not a substitute for it. Your WooCommerce store still handles every order regardless of how the shopper found you.
5. What does this actually cost?
Registering as a merchant and submitting a feed is free on OpenAI's end. You will need a product feed plugin, and pricing for those varies by provider. OpenAI hasn't announced a platform fee or revenue share for purchases completed on a merchant's own site, but it's worth checking current merchant terms before you launch, since program terms can shift.
About the Author: Jason-Pat
Founder & CTO at AccuWebHosting.com. He shares his web hosting insights at AccuWebHosting blog. He mostly writes on the latest web hosting trends, WordPress, storage technologies, Windows and Linux hosting platforms.